Attic Conversion: Essential Checklist Before You Start
- An attic is only convertible if it offers at least 1.80 m (approx. 5’11”) of ceiling height over two-thirds of its surface area and sufficient roof pitch to create livable volume.
- The type of roof framing (traditional vs. prefabricated trusses) heavily influences feasibility and budget; trussed rafters often require costly reinforcement.
- Depending on the floor area created, the project may require a simple planning application (5 to 20 m²) or a mandatory building permit with an architect (beyond 20 m² or if the total house area exceeds 150 m²).
- Budgets typically range from €350 to €1,200/m² for standard projects, but can climb to €2,200–€2,800/m² if structural reinforcement or plumbing for a bathroom is required.
- Thermal insulation, ventilation, and access (stairs, fire safety) are technical details often underestimated, yet they ultimately determine the room’s actual comfort.
Before thinking about decor, attic conversion raises one critical question: is this space technically and legally transformable into a livable room? The answer depends on three factors verifiable in a single walkthrough: ceiling height, roof pitch, and the type of load-bearing structure. An attic that doesn’t meet these criteria isn’t necessarily a lost cause, but it will fundamentally change the project’s nature—and its budget. This guide details the essential checkpoints to clear before signing a quote, the regulatory thresholds for planning permission or building permits, and the technical requirements (insulation, windows, access) that separate a comfortable new room from a costly mistake.
Feasibility diagnosis: height, pitch, and volume
Before any cost estimation, an attic must be evaluated for its ability to generate livable volume. The standard rule sets the bar at 1.80 m of ceiling height over at least two-thirds of the floor area. Below this threshold, the space remains classified as non-habitable, even after renovations: you cannot legally declare it a bedroom or office. In practice, professionals recommend aiming for 2.50 m at the ridge for daily comfort, as 1.80 m is merely a legal minimum, not a standard for living.
The roof pitch is the second deciding factor. A roof that is too flat won’t provide enough usable volume, regardless of the ridge height; the usable floor area mechanically shrinks as the pitch decreases. Conversely, a sufficiently steep slope allows the 1.80 m line to extend further toward the eaves, gaining several square meters of functional space. This is why two houses with the same ridge height can offer vastly different livable areas depending on the angle of the roof.
Finally, the geometry of the attic (A-frame, W-frame, presence of intermediate posts) must be precisely measured, ideally by a professional using a laser meter, before budgeting. A rough sketch made by eye almost always underestimates the wasted space under the slopes, which subsequently skews the calculation of taxable area and the actual marketable living space.
Traditional framing vs. trusses: a deciding factor
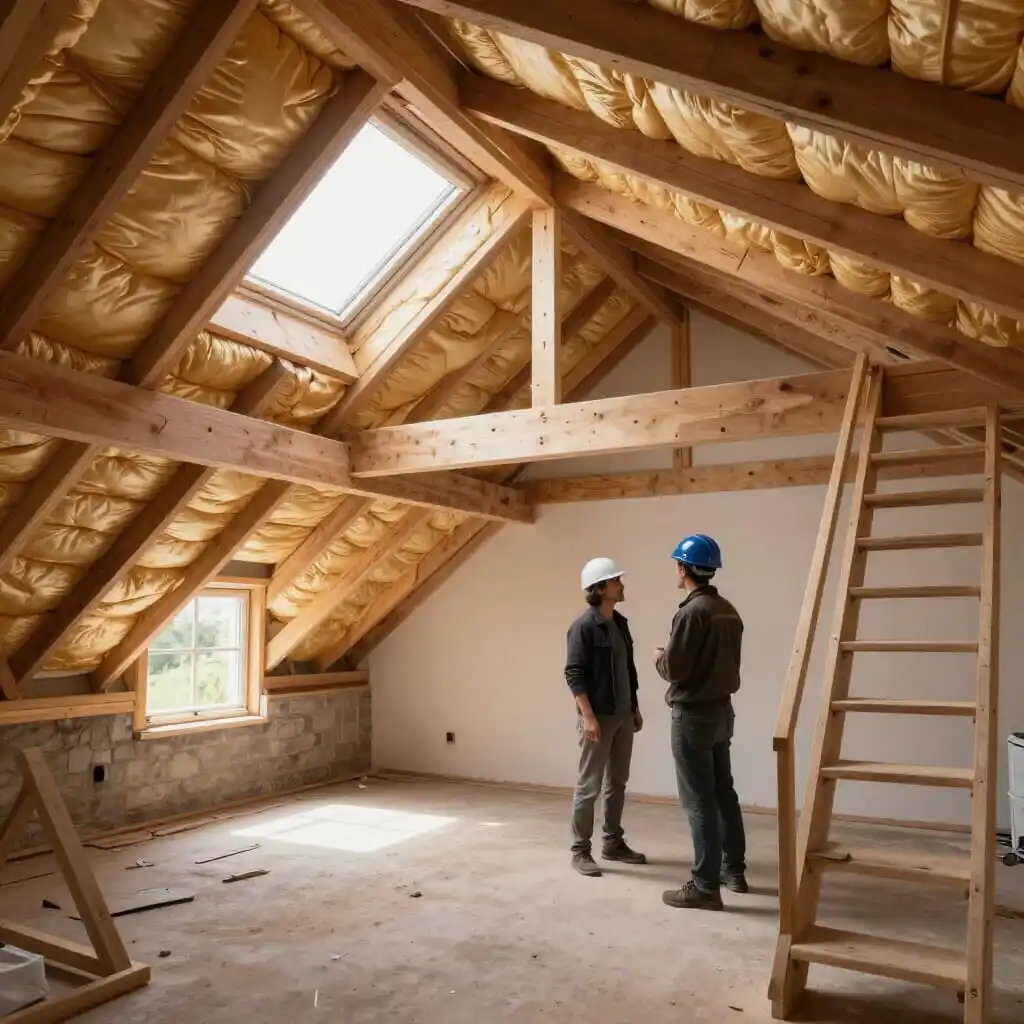
The nature of the roof structure is perhaps the most underestimated technical criterion for homeowners. Traditional framing, consisting of widely spaced rafters and purlins, leaves open volume between the load-bearing elements; it is naturally suited for conversion, requiring only occasional reinforcement.
In contrast, prefabricated trusses—very common in homes built between the 1970s and 2000s—consist of a dense web of lightweight timber, reinforced with cross-bracing and tie beams that traverse the entire volume. This structure is not designed to be cleared out; every element is vital to the building’s stability. Converting this type of attic requires either removing the trusses and replacing them with traditional framing or adding a secondary structure (metal frames or glulam beams) to take the load. This process, often handled by a structural engineer or specialized carpenter, explains the massive price gap between a simple conversion and one involving structural work, which can more than double the cost per square meter.
An additional point of caution concerns the load-bearing capacity of the existing floor. Attic floor joists are generally designed for light storage, not for a living space filled with furniture, partitions, and people. A structural diagnostic, sometimes including load calculations, is necessary to check if the floor needs reinforcing before the final flooring is laid—a step that must never be skipped to avoid cracks or sagging once the room is furnished.
Thermal insulation: the key to comfort
A poorly insulated attic turns into an oven in the summer and a freezer in the winter; this is the most critical factor for daily comfort, far more so than interior design. Two main techniques are used. Internal insulation (ITI), the most common for renovations, involves placing insulation (glass wool, wood fiber, or cellulose) under the rafters, between joists, or over a secondary frame. It is more budget-friendly but slightly reduces the usable volume and requires careful attention to detail at connection points.
External roof insulation (sarking), applied above the roof structure during a re-roofing project, preserves the entire interior volume and better manages thermal bridges at the wall-to-roof junctions. It is more expensive and only makes economic sense if the roof covering is already scheduled for replacement.
In both cases, the most frequently neglected checkpoint is airtightness, ensured by a continuous vapor barrier on the interior side. A single tear or a poorly taped seam around a skylight or a vent is enough to create a thermal bridge and, more seriously, a risk of condensation within the insulation. This can lead to mold growth that remains invisible until the damage is already extensive. The ventilation of the air gap under the roof—between the roofing felt and the insulation—must also be verified; without sufficient airflow, ambient humidity has nowhere to escape.
Skylights and natural light
An attic converted without sufficient natural light will remain an underused space, regardless of the finish quality. Skylights are the most popular solution because they integrate directly into the roof plane without modifying the structure. Choices mainly include center-pivot windows, top-hung windows (which provide more head clearance when open, ideal for low-ceiling areas), and fixed models for areas where access to the opening isn’t required.
The placement of these windows requires careful planning: an installation that is too low or poorly centered relative to future furniture (beds, desks, wardrobes) can create visual discomfort or glare that is difficult to fix later. Professionals generally recommend a sill height between 0.90 and 1.10 m from the finished floor to balance the view with safety.
For attics with more volume, creating a dormer window allows you to open a vertical facade. This provides more headroom at the edges and brings in light that is less “zenithal” (direct overhead light), making it less glaring. However, this solution is significantly more expensive, as it involves structural and roofing changes and alters the building’s exterior appearance more visibly—a factor that directly impacts the type of planning permission required.
Planning permission vs. building permits: the thresholds
Any modification to the external appearance of the roof, including the installation of a simple skylight, requires a planning application, regardless of the area involved. This often surprises homeowners who believe a purely interior renovation is exempt from formalities: as soon as a window or dormer changes the roofline, the local council must be informed before work begins.
The requirements become stricter based on the created floor area. For an increase of 5 to 20 m², a simple planning application usually suffices. Beyond 20 m², or if the project brings the total house area above 150 m², a building permit becomes mandatory and an architect is often required, involving longer processing times and more formal procedures. Note that the 150 m² threshold applies to the total floor area of the house after works, not just the attic space—a calculation error that often traps ambitious projects.
Ignoring these steps is not an option: unauthorized work can lead to inspections, forced compliance, or even partial demolition in extreme cases. It can also seriously complicate the resale of the property, as notaries or buyers may demand regularization before closing. A planning application typically takes about a month to process, while a building permit can take two to three months; these timelines must be integrated into your project schedule to avoid delays.
Budget: what the price per m² really covers
The cost of an attic conversion varies widely depending on the starting condition, which explains the broad range provided by professionals: between €350 and €1,200/m² for a standard project including insulation, partitions, electricity, and basic finishes, without structural changes. This lower end applies to attics that are already easily accessible, with traditional framing in good condition and comfortable ceiling heights.
The budget jumps significantly as soon as structural work is required. Converting trussed rafters, installing a permanent staircase where none existed, or adding a bathroom (requiring new plumbing and dedicated ventilation) can push costs to €1,300 or even €2,800/m² in constrained configurations. It is precisely these elements—structure, plumbing, and access—that cause quotes to triple from one job to the next, far more than the choice of decorative materials.
To refine a budget before consulting contractors, it is helpful to break the quote down into major categories: structure and reinforcement, insulation and airtightness, openings (skylights or dormers), electricity and plumbing, then partitions and finishes. This breakdown allows you to see immediately if a quote omits a key item—such as floor reinforcement or electrical upgrades—enabling you to compare offers on a truly like-for-like basis.
Access, safety, and daily comfort
Beyond structure and insulation, several practical points dictate how the room will actually be used. First is access: a pull-down ladder, practical for a storage attic, quickly becomes a daily obstacle for a bedroom or office. Replacing it with a permanent staircase involves cutting through the floor of the level below, impacting the available space downstairs—a trade-off that must be decided during the initial planning phase.
Mechanical ventilation must be integrated into the design from the start, especially if a bathroom is planned or if the room serves as a bedroom. Without sufficient air renewal, humidity from breathing and daily activities will concentrate under the roof, directly contacting the insulation.
Fire safety also warrants a check, particularly for upstairs bedrooms: regulations generally require an accessible emergency exit, which may influence the choice between an operable skylight and a dormer window depending on the available clearance. Finally, the integration of smart home technology—motorized roller shutters on skylights, smoke detectors linked to a smart system, or remote-controlled thermostats to manage attic temperature fluctuations—should be planned during the wiring phase. Adding these features after the drywall is up leads to expensive and unsightly repairs.
Project sequencing and choosing the right pros
An attic conversion involves different trades in a specific order, and reversing this sequence is an expensive mistake. The logical sequence usually follows: structural and feasibility diagnosis, planning applications, shell work (framing reinforcement, creating openings), waterproofing and insulation, and finally, interior fit-out (electricity, partitions, flooring). Starting finishes before validating the structure, or installing insulation before verifying the roof’s airtightness, are common errors made by homeowners eager to see visual progress.
The choice of contractors follows this same dependency. A carpenter or structural engineer is first if the framing needs modification; a roofer for any roof openings; then an insulator; and finally the interior trades. For projects involving structural changes or exceeding size thresholds, hiring a project manager or an architect can help coordinate these workers and prevent inconsistencies between different work packages—a particularly useful role when multiple independent contractors are working on the same site without single-point supervision.
Finally, always request an up-to-date 10-year structural warranty (decennial insurance) from every contractor, especially for work involving the structure or waterproofing. This insurance is what protects the homeowner in the event of structural issues or leaks discovered in the years following the completion of the work.
What is the minimum height required for an attic conversion?
The ceiling height must reach at least 1.80 m over at least two-thirds of the floor area for the space to be considered habitable. For daily comfort, a ridge height close to 2.50 m is generally recommended.
Do I need a building permit for an attic conversion?
It depends on the area created. For an increase of 5 to 20 m², a planning application usually suffices. Beyond 20 m², or if the total house area exceeds 150 m² after works, a building permit and often an architect are mandatory.
How much does an attic conversion cost per m²?
The budget is generally between €350 and €1,200/m² for a standard project without structural changes. It can reach €1,300 to €2,800/m² when structural reinforcement or a new bathroom is required.
How can I tell if my roof structure allows for a conversion?
Traditional framing with spaced rafters is naturally suited for conversion. Prefabricated trussed rafters, which are very common, most often require removal or structural reinforcement before conversion can proceed.
Can you convert an attic with trussed rafters?
Yes, but this involves removing the truss elements that cross the volume and replacing them with traditional framing or a secondary load-bearing structure, which significantly increases the project budget.
Should I insulate the attic before or during the conversion?
Insulation must be installed before the interior finishes, once the roof’s airtightness has been verified. Insulating after the drywall is up requires costly repairs and compromises the continuity of the vapor barrier.
Which type of skylight should I choose?
The choice depends on the room and the roof pitch: top-hung windows provide more head clearance in low-ceiling areas, while a dormer window provides more vertical light but requires more expensive structural work.
How can I check if my floor will support the conversion?
A structural diagnostic can verify the load-bearing capacity of existing joists, which were originally designed for light storage. Floor reinforcement is frequently necessary before installing final flooring.
Sources
- Service-public.gouv.fr — Planning permission for attic conversions
- Notaires — Urban planning rules for attic conversions
- Isolationcombles.org — Permissions and ceiling height
- Construires.fr — Attic conversion prices per m²
- Prix-pose.com — Average rates for attic conversion

D'autres conseils Real Estate & Construction
 →
Profitable Home Improvements: Best Investments to Boost Valu
Discover the most profitable home renovation projects to increase your property value. Kitchens, bathrooms, insulation, and more: our expert advice.
Lire l'article → →
Full Home Renovation: Preparation Guide
Prepare for your full home renovation: diagnostics, budgeting, permits, and smart home integration. Expert tips for a hassle-free project.
Lire l'article → →
Track Construction Progress: Effective Methods & Tools
Learn how to effectively track construction progress with simple indicators, practical tools, and proven methods to stay on schedule and budget.
Lire l'article → →
Build vs. Renovate: How to Choose the Best Option
Deciding whether to build a new home or renovate an existing one? Compare costs, smart home integration, and energy efficiency to find your best…
Lire l'article →