
Insulation and humidity: mistakes to avoid
- Insulating a damp wall without treating the root cause (leaks, capillary rise) worsens the problem rather than solving it.
- A faulty vapor barrier or improper placement on the “cold side” can trap water vapor within the wall, triggering invisible internal condensation.
- Insulating without rethinking ventilation is the most common mistake: a better-sealed home breathes less and accumulates indoor humidity.
- A smart humidity sensor can detect issues before mold appears, long before damage is visible to the naked eye.
- A humidity diagnostic before starting work prevents costly rework and protects the long-term thermal performance of your insulation.
Are you planning to insulate your home but wondering if it might aggravate an existing humidity problem or even create a new one? The answer boils down to one sentence: insulation is never the direct cause of humidity; it is incorrect implementation that reveals or amplifies it. An insulated wall without prior moisture treatment, a poorly placed vapor barrier, or neglected ventilation can turn a project meant to improve your comfort into a source of mold and structural degradation. This guide outlines the most frequent mistakes made before and during thermal and acoustic insulation work, so you can spot and avoid them during the preparation phase.
Why humidity is the silent enemy of your renovation
Insulation profoundly changes how a wall or roof manages water vapor. Before renovation, an old, uninsulated wall generally stays at roughly the same temperature on both sides: the moisture passing through it evaporates freely, never stagnating long enough to cause damage. Once insulation is installed, the rules change completely. The wall ends up with a warm interior face and a cold exterior face, and it is precisely at this boundary that water vapor from the indoor air can condense—a phenomenon known as interstitial condensation.
The problem is compounded by a fact many homeowners overlook: water is an excellent conductor of heat, and damp insulation loses a significant portion of its ability to retain warmth. In some cases, the thermal performance of insulation can drop by up to 50% when saturated with moisture, effectively nullifying much of the benefit you were seeking. Wet insulation doesn’t just insulate less; it also becomes a breeding ground for mold and the gradual degradation of structural materials, including wooden beams or metal studs.
Three main causes explain the vast majority of moisture-related issues after insulation: untreated thermal bridges that create localized cold spots, air leakage defects that allow vapor to migrate where it shouldn’t, and pre-existing capillary rise or leaks that were never identified before the project began. Understanding this trio is the first step toward avoiding the mistakes that follow.
Error #1: Insulating a damp wall without treating the cause
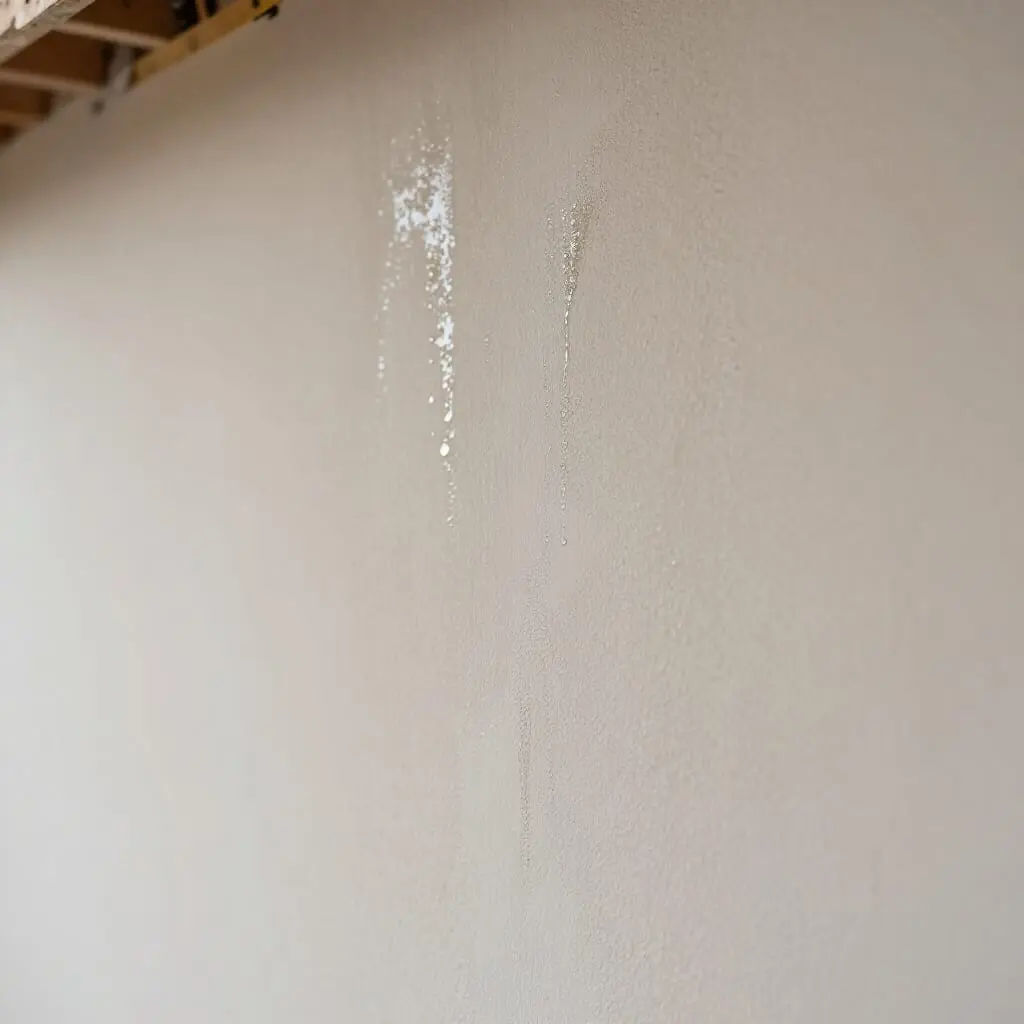
This is the most consequential error, yet one of the most common. When faced with a wall showing stains, a musty smell, or efflorescence (saltpeter), the reflex is often to “cover up” the problem by installing insulation over it, hoping it will solve the issue. The exact opposite happens: insulating a damp wall without treating the source traps moisture between the wall and the insulation, accelerating the degradation of the substrate and making the problem invisible—but very much present—behind a new surface.
Before considering any insulation, you must precisely identify the origin of the moisture: rainwater infiltration through a damaged facade, capillary rise from the foundations, a plumbing leak, or simple condensation due to insufficient ventilation. Each cause requires a specific treatment distinct from the insulation work itself: repairing facade sealing, installing a capillary break, or fixing the identified leak. Only once the cause is treated and the wall has returned to a normal moisture level—which can take several weeks of drying depending on the thickness and nature of the material—can insulation be safely considered.
A simple but often neglected diagnostic step is to measure the wall’s moisture level with a moisture meter before work begins, and compare this reading to a healthy reference area in the same house. A significant discrepancy should serve as a warning to postpone insulation until the root cause is resolved.
Error #2: Neglecting the vapor barrier or installing it on the cold side
The vapor barrier (or its more flexible cousin, the vapor retarder) plays a specific role: limiting the migration of water vapor produced inside the home into the insulated structure, where it might condense upon contact with a cold zone. Two errors recur constantly on job sites, even among DIYers insulating attics or interior walls.
The first is omitting it entirely, particularly when using bio-based insulators like wood fiber, hemp, or cellulose wadding. These materials are hygroscopic: they naturally absorb moisture from the air, which can be an asset for regulating indoor ambiance, but becomes a problem if the insulation remains saturated without the possibility of drying out. Some construction systems using bio-based materials can function without a strict vapor barrier, provided a hygrovariable vapor retarder is used and the manufacturer’s recommendations are strictly followed, but skipping it without technical planning is risky.
The second, more insidious error is installing a vapor barrier correctly but on the wrong side of the insulation. The golden rule is that the vapor barrier must always be positioned on the warm side of the structure—meaning the interior side of the home in temperate climates—to block vapor before it reaches the cold zone where it would condense. An inverted installation, or a membrane pierced by multiple unsealed fasteners, nullifies much of its effectiveness and can even worsen condensation by trapping moisture on the wrong side of the insulation.
Error #3: Insulating without rethinking ventilation
This is likely the most frequent and underestimated mistake made by homeowners performing incremental renovations. An old house, even if poorly insulated, often ventilates “naturally” through its leaks: gaps around window frames, imperfect seals, and “breathing” walls. Once these defects are corrected through insulation and airtightness work, this involuntary ventilation disappears, and nothing replaces it if the air renewal system has not been updated in parallel.
The concrete result on the ground: the water vapor produced daily by occupants—through showers, cooking, drying laundry, and breathing—no longer has a natural escape route. It accumulates in the indoor air before condensing on cold spots in the home, particularly in wall corners, behind furniture placed against exterior walls, or above windows. This mechanism explains why black spots often appear just a few months after an insulation project that was otherwise perfectly executed in terms of materials.
The rule to remember is simple: any gain in airtightness achieved through insulation must be compensated by an equivalent improvement in the ventilation system, whether it be an upgraded single-flow mechanical ventilation system, a dual-flow system (MVHR), or, at a minimum, new air inlets sized for the renovated home. You must also avoid the opposite extreme: over-sized ventilation relative to the home’s actual needs generates unnecessary heat loss, eating into the energy savings expected from the project. The balance between airtightness and air renewal must be calculated, not improvised.
Error #4: Leaving untreated thermal bridges
A thermal bridge is a zone in a wall where the continuity of insulation is broken, either intentionally or through negligence: the junction between a wall and a floor, around a window, the connection between an extension and the existing structure, or a through-wall balcony support. Once the rest of the wall is insulated, these specific points become the coldest zones in the home and, therefore, the most exposed to condensation.
The paradox is cruel: the better the general insulation of the home, the more visible and problematic the remaining thermal bridges become, because the temperature gap between the insulated zone and the thermal bridge increases. This is why moisture stains or mold sometimes appear precisely in corners or around the perimeter of windows after insulation work that was otherwise well-managed on the rest of the surface area.
Addressing thermal bridges requires a holistic approach to the building rather than partial insulation performed room by room or wall by wall. Using thermal bridge breaks at floor levels, extending insulation into window reveals, or ensuring continuous insulation between walls and roofs can limit these cold spots. Failing a complete treatment, it is essential to identify remaining thermal bridges before work begins—for example, using a thermal imaging camera—to anticipate their impact and adjust ventilation accordingly in the affected areas.
Error #5: Choosing insulation unsuitable for the existing structure
Not all homes behave the same way when faced with humidity, and this is particularly true for older properties. Stone, rammed earth, timber-framed, or solid brick walls built before the 1950s were often designed to be “breathable”—meaning they are capable of allowing water vapor to circulate through their thickness rather than blocking it. Applying a vapor-impermeable insulator to these walls, such as certain synthetic materials combined with a strict vapor barrier, works against this natural function and traps moisture inside the wall.
For these types of buildings, breathable bio-based or mineral insulators—such as wood fiber, hemp, cork, or even certain lime-hemp plasters for distributed insulation—are generally better suited because they allow vapor to continue circulating while slowing heat loss. The reverse is also true: on a modern concrete or cinder block wall, correctly designed with controlled airtightness, a synthetic insulator paired with a classic vapor barrier generally poses no particular problem.
The choice of insulation should never rely solely on the price-to-performance ratio displayed in stores. It must take into account the nature of the substrate, its age, its exposure to moisture, and the compatibility between the different layers of the construction system. An experienced craftsman specializing in period properties will know how to guide this choice, but an informed homeowner can rule out the most obvious incompatibilities even before requesting a quote.
Error #6: Over-insulating without a global strategy
In an effort to maximize energy savings, some insulation projects push airtightness to the extreme without rethinking the entire system that makes up the home. This “over-insulation” is not a problem in itself, provided it is accompanied by appropriately sized ventilation and consistent moisture management at every level of the wall. The problem arises when airtightness is treated as an isolated goal, disconnected from the other parameters of the building.
A home made extremely airtight without adapted ventilation becomes a sort of closed bubble where the humidity produced by occupants has nowhere to go. The consequences manifest progressively: persistent condensation on window panes, a feeling of stuffy air, and the appearance of mold in less ventilated areas like closets against an exterior wall or bathrooms without windows. This phenomenon is even more common when work is carried out in several phases over time—insulating the attic one year, replacing windows the next—without a professional re-evaluating the ventilation at each stage.
The right approach is to consider insulation, airtightness, and ventilation as a single, unified system rather than three independent projects. Before each new stage of work, it is useful to ask how it will modify the existing balance and whether the current air renewal system remains sufficient for the new level of airtightness achieved.
The four-step pre-work humidity diagnostic
Before committing to an insulation project, a few simple checks can prevent most of the errors listed above and ensure you are starting from a healthy baseline.
Step one consists of measuring the relative humidity of the air in the affected rooms, ideally over several days and at different times, to spot any peaks related to showers, cooking, or drying laundry. A sustained relative humidity level above 60% in indoor air is generally considered a warning sign that must be addressed before, not after, installing insulation.
Step two involves a visual inspection of walls and ceilings for revealing traces: water stains, bubbling paint, efflorescence at the base of walls, or a persistent musty smell even after airing out the room. These signs should be taken seriously even if they seem minor, as they often signal a problem that will worsen once the wall is covered with insulation.
Step three is to evaluate the state of the existing ventilation: the presence and operation of mechanical ventilation, the condition of air inlets, and whether occupants actually practice manual airing.
Step four is the identification of thermal bridges and the coldest zones of the home, which will become priorities in your upcoming insulation strategy. This diagnostic, which can largely be performed by the homeowner before requesting quotes, allows you to arrive better prepared when speaking to contractors and to ask the right questions about their methods.
Anticipating issues with smart humidity sensors
Once the work is completed, the risk does not disappear entirely: a faulty installation may take several months to manifest visually, as the time it takes for accumulated moisture behind a wall to finally penetrate a coating or generate a perceptible odor. This post-work monitoring phase is precisely where connected measurement tools become invaluable.
A connected humidity and temperature sensor, placed in areas identified as sensitive during the diagnostic (north-facing wall corners, attics, basements, or bathrooms), allows you to track the evolution of relative humidity over time and receive a smartphone alert as soon as a value falls outside the normal range. This continuous monitoring offers a decisive advantage over occasional visual checks: it detects a progressive drift several weeks before mold becomes visible, giving you time to intervene before damage becomes permanent in the materials.
Some home automation systems go further by coupling these sensors with mechanical ventilation or motorized window openers to automatically trigger increased ventilation when humidity levels exceed a defined threshold, without manual intervention from occupants. For a homeowner who has just insulated their home, installing two or three smart sensors in high-risk zones represents a modest investment compared to the cost of reworking projects due to a humidity problem discovered too late. This monitoring does not replace a professional diagnostic in case of serious doubt, but it serves as a highly accessible first line of defense for any modern homeowner equipping their home with smart devices.
Can you insulate a damp wall without risk?
No, not directly. You must first identify and treat the cause of the moisture—whether it’s a leak, capillary rise, or infiltration—and then allow the wall to dry completely before installing insulation. Insulating a still-damp wall traps water inside the structure.
Should I always install a vapor barrier with interior insulation?
Not necessarily. It is essential with most bio-based insulators on the interior side to limit vapor migration, but some breathable systems use a hygrovariable vapor retarder instead. The choice depends on the type of insulation and the nature of the wall, and should be validated according to the manufacturer’s guidelines.
How long should I wait after water damage before insulating?
Drying time varies depending on the extent of the damage and the thickness of the wall, but you should generally expect several weeks, or even longer for thick stone walls. Checking the residual moisture level of the substrate is much better than relying on an estimate before resuming work.
What indoor humidity level is considered normal?
A relative humidity level between 40% and 60% is generally considered comfortable and safe for a home. Staying consistently above 60% significantly increases the risk of condensation on cold surfaces and mold growth.
Is mechanical ventilation mandatory after insulation work?
It is not always legally mandated depending on the scope of the work, but it is strongly recommended whenever the airtightness of the home is improved, as “natural” ventilation through leaks will disappear once those gaps are sealed.
Which insulators resist humidity best?
Certain mineral insulators, such as cellular glass or expanded cork, maintain their performance well even in the presence of occasional moisture. Bio-based insulators like wood fiber or cellulose can tolerate humidity fluctuations if they are able to dry out, but they remain sensitive to untreated, stagnant moisture.
How can I tell if my insulation already has a humidity problem?
Signs to watch for include a persistent musty odor, stains or watermarks on walls or ceilings, recurring condensation on window panes, or a localized feeling of coldness despite recent renovations. A smart humidity sensor or a professional inspection can confirm the diagnosis before the damage worsens.
Sources
- Insulation and humidity: avoiding hidden damage — Artisans Isolation
- Insulation, humidity and condensation: how to avoid them — Selectra
- Vapor barriers in insulation, why are they essential — La Maison Saint-Gobain
- Mold in the home, how to avoid and treat it — Ministry of Health

D'autres conseils Energy-Efficient Renovation
 →
Best Heating Systems for Renovation: 2026 Comparison
Choosing a heating system for your renovation? Compare heat pumps, gas, wood, and electric options in our 2026 guide with practical expert advice.
Lire l'article → →
Wall Insulation: Interior vs. Exterior? Full Comparison
Compare interior (ITI) vs. exterior (ITE) wall insulation. Learn the pros, cons, costs, and how to choose the best option for your home renovation.
Lire l'article → →
Reduce Heating Bills Sustainably | Smart Home Tips
Learn how to reduce your heating bill by 7% per degree. Discover expert tips on insulation, smart scheduling, and energy-saving gadgets.
Lire l'article → →
Energy Renovation: Comfort, Savings & Home Value
Discover how energy renovation improves comfort, reduces bills, and boosts property value through insulation, heating, and smart upgrades.
Lire l'article →